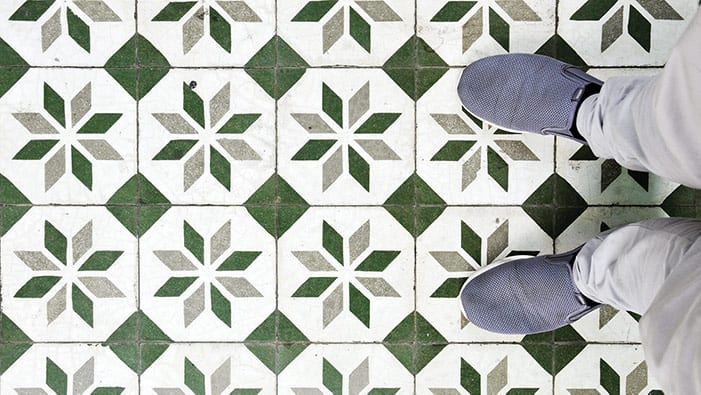
If you have tile floors in your home, you probably already know both their advantages and disadvantages. On one hand, they retain water much better than other floorings. On the other hand, tile floors can be extremely slippery, especially when wet. This can lead to all kinds of injuries, even serious ones (I know from experience).
Therefore, it’s always a good idea to make tile floors safer by reducing slipperiness and improving traction. The good news is that you can make tiles much safer quickly and easily without having to spend a fortune.
If you want to make your tile floor less slippery, you have basically 4 options:
- Make the smooth surface of the tiles rougher to create more traction (usually done by using an anti slip solution or spray)
- Add anti-slip treads or stickers
- Cover the tile floor with non-slip rugs or mats
- Switch to non-slip floor tiles (only recommended if you’re planning a full renovation)
And now let’s see the most powerful ways you can make slippery tiles safe:
1. Use an Anti-Slip Solution to Make Tile Floor Less Slippery
You can find quite a few anti-slip solutions on the market, like InvisaTread or Liquid Traction. They all work by adding some texture to your tiles so you’ll end up with less slippery surfaces instead of smooth ones.
This is the non-slip product I tried and recommend (it’s called Stone Grip).
Stone Grip non-slip treatment can be applied to ceramic tiles, porcelain tiles, and stone floors. It works by creating micro treads on the tile surface that increase traction and reduce slipperiness.
The manufacturer claims that it doesn’t change the color and appearance of the flooring (and it didn’t change mine) but I suggest trying it on a small area before applying it on the whole surface. It can be used both indoors and outdoors (so it’s a great choice for pool areas too).
Stone Grip has made my ceramic tiles significantly less slippery so they’re much safer now. Even if they get wet, I don’t really have to worry about slipping or falling and the effect seems to be long-lasting.
I used it in the bathroom and kitchen, but you can practically apply it to any indoor or outdoor ceramic, stone, and porcelain surfaces. You can even use it for business and commercial purposes.
So I got really great results using Stone Grip, it did exactly what I expected. Here are some of its benefits from my own experience:
- it created a highly resistant anti-slip coating on my tiles,
- substantially increased traction,
- made the whole bathroom much safer,
- was fairly easy to use,
- the end result is visually appealing (I mean the treatment did not change the appearance of the floor),
- moreover, it didn’t take me hours but only about 30-40 minutes to finish the whole process.
I got my bottle from Amazon because at that time there was a discount but I guess you can get one at your local hardware store as well. You can check the current pricing here.
Let’s see the main steps to make your tile floor less slippery using Stone Grip:
- First of all, I want to emphasize the importance of preparation. You must clean your tiles with a pH-neutral or slightly acidic cleaner as a first step. If you don’t prepare the surface properly, chances are the end result won’t be totally satisfying. So make sure you read the instructions that come with your bottle thoroughly.
- During the process, you’ll need a so-called neutralizer: it’s basically nothing else but a mixture of clean water and baking soda. Prepare it before you start using Stone Grip: fill a bucket (you can also use a small tank sprayer) with tap water and add one or two tablespoons of baking soda to each gallon of water.
- If everything is prepared, it’s time for testing. Choose a small inconspicuous area. Make sure it’s clean and completely dry, then apply a small amount of Stone Grip. You should test the slip resistance every 30 seconds with a rubber-soled shoe.
Also, make sure you measure the elapsed time. Once you get the desired result (it’s usually between 5 and 15 minutes but do not let the solution dry), you have to rinse the test area with the neutralizer. - Now you have to repeat the previous step on the whole surface with the difference that this time you don’t have to test the slip resistance because you know exactly how long you have to let the anti slip solution sit on the tile floor before you rinse it with the neutralizer.
So these are the main steps. I didn’t go into every little detail, so make sure you also read and follow the instructions of the manufacturer carefully before using the solution. This is key to creating a long-lasting anti-slip coating.
Also, make sure you always use chemical-resistant protective gloves, eye protection, and a face mask during the process. Wear clothing that protects your skin. Never use the solution on glass and metal surfaces.
It’s good to know that the manufacturer guarantees that Stone Grip increases the coefficient of friction (it’s a number that shows how slip-resistant a surface is) of your tile floor for at least two years but according to the reviews I’ve read the slip-resistant effect usually lasts for about 4-8 years.
If the only thing you want is to make your tiled shower or ceramic (or porcelain) bathtub less slippery, I recommend this anti-slip treatment kit (it’s cheaper and easier to use).
Here is a short video about how effective Stone Grip is:

If home safety is a top priority for you, check out our comprehensive article full of useful advice and important home safety rules (with a downloadable checklist) here.
Try an Anti-Slip Spray
If you find the use of an anti-slip solution too cumbersome, as an alternative you can try a spray to improve traction.
While in my experience a spray is somewhat less effective than a solution, it will still give you a much better result than an untreated surface.
To create a non-slip coating, in most cases a single application is enough (but it depends on the product you use). Most anti-slip sprays can be used on both interior and exterior surfaces and many of them are suitable for ceramic tiles as well.
2. Use Anti-Slip Treads: a Simple Yet Effective Method
If you need an inexpensive and simple solution to make your slippery tiles safer, non-slip treads (or stickers) are your best bet. They can be applied on indoor smooth surfaces, like bathroom ceramic tiles or stairs.
The main advantage of anti-slip treads, besides being cheap, is that they do a pretty good job without altering the original surface of the tiles. They are removable, so if you change your mind and want to try something else, you can easily get rid of them without damaging the surface.
On the other hand, they are usually not as durable as non-slip treatments and they somewhat alter the appearance of the surface as they’re visible.
While it’s true that anti-slip treads are widely available, many of them are poor-quality items that don’t attach to the surface properly and often peel off after just a few weeks.

3M is a reliable manufacturer and it has a high-quality product that comes at a reasonable price. That’s a perfect choice for slippery bathroom floors.
For any other smooth areas of the house, I recommend YBLNTEK adhesive treads.
If you want to reduce the slipperiness of outdoor surfaces, check out the anti-slip tape of LifeGrip.
3. Cover Your Tile with Non-Slip Rugs
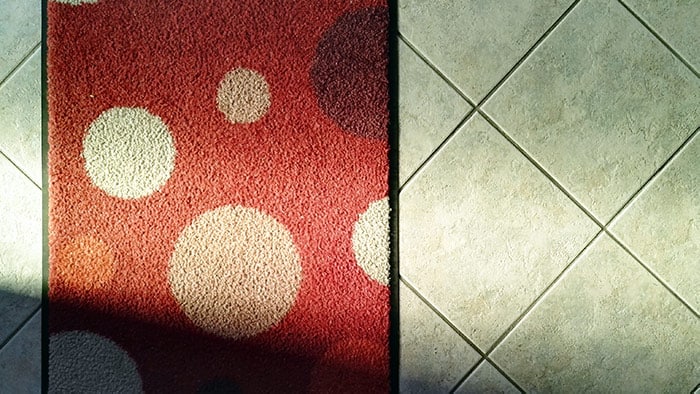
Using non-slip rugs is probably the quickest and easiest method to make your tile floor non-slip. I really like rugs because I think they can liven up a whole room and at the same time they also make it cozier.
However, not all rugs are created equal when it comes to safety. Unsecured, loose rugs and rugs with curled edges can be a tripping hazard and they’re potentially hazardous. If you want to prevent slips and falls, you’ll need rugs with non-slip backing. There’s a large selection of non-slip rugs in online and offline stores as well.
If you want to use your existing rugs, you can significantly enhance safety by placing non-slip rug pads underneath them. If your rug has a unique shape, you can trim the pad with a scissor to size.
If you need a home remedy for slippery tiles and you like DIY projects, instead of using a non-slip rug pad, you can draw some criss-cross lines with a hot glue gun on the rear surface of your rug and then just leave it to dry. The dried glue will serve as an effective anti-slip agent. Note that this method won’t work with all types of rugs, so you should test it before applying it on larger surfaces.
You can also combine rugs with the anti-slip solution method so that you can leave larger areas uncovered without having to worry about slips.
Note: If you use rugs to reduce the slipperiness of your tiles, always make sure they’re secured to the floor.
Make Your Bathtub or Shower Slip Resistant Using a Safety Mat
Shower floors and bathtubs sometimes can be extremely slippery. The above-mentioned non-slip treatment makes them much safer, however, if you need a really simple solution, get a safety mat.
Safety mats effectively prevent slips in the bathtub and shower when applied properly: it’s important to use them on clean and smooth surfaces otherwise their suction cups won’t attach securely to the surface of the bathtub or shower.
If you want to make your bathtub or shower safer, I recommend you check out this mat on Amazon: it has a lot of positive reviews and it comes in different colors and sizes so you can choose the one that suits your needs best.
4. Cover the Floor with Foam Interlocking Tiles
Foam tiles are primarily used to create a cushioned non-skid surface for workouts. However, you can also use these foam mats to cover your slippery floor.
You might want to choose this approach if you need a quick and temporary solution that does not alter the surface of the tiles at all.
Here’s what they look like:

To be honest, if I had to choose, I would rather go for a non-skid rug instead of using these black tiles in my bathroom. However, if your original tiles are even uglier, these foam mats can be a reasonable choice.
Pros:
- quick to install and remove
- lightweight and easy to clean
- protects the tile floor underneath
Cons:
- can only be applied on even surfaces
- it covers the original floor (and it’s probably much less visually pleasing than tiles)
- the foam tiles have given dimensions and they won’t necessarily fit in the room
- can be a tripping hazard (mats usually have a height of 1/2 inch or more)
5. Replace Old Tiles with Non-Slip Ones
First of all, I would like to point out that I wouldn’t replace floor tiles just to make them less slippery. I think it’s only a reasonable choice if your tiles are old or damaged, or if you don’t like them anymore and you’re planning to replace them anyway.
While it’s true that this is a pretty expensive and time-consuming way of making your floors safer, it can give you really amazing results. Moreover, if you choose a quality product, you can enjoy safety practically as long as you keep the tiles in place because they won’t wear off.
In Summary
As you can see, you can make your slippery tile floor safe quite easily, even if you’re on a budget. If you want to use rugs, make sure you opt for non-slip ones. As an alternative, you can place non-slip pads underneath your old rugs or use a hot glue gun to make them slip-resistant. Using rugs that are properly secured to the floor is the fastest and easiest way to make your bathroom and kitchen tile floor less slippery.
If you don’t want rugs on your tile floor, use an anti-slip solution, like Stone Grip. Yes, you’ll have to spend some time preparing the surface and applying the solution but in my experience, it’s well worth the effort and time invested because it solves your problem for years.
A simpler method is using anti-slip treads on your smooth surfaces. They are inexpensive and can be installed within minutes. These treads significantly increase the traction of smooth surfaces so they effectively prevent sudden falls and slips, which is particularly important for the elderly.