At a Glance
- Turn any size space into a relaxing retreat with zoned layouts, layered lighting, and weatherproof materials – all centered on smart, practical outdoor patio decor.
- Typical total cost: $300-$800 (budget DIY), $900-$2,500 (mid-range DIY), $3,000-$10,000+ (premium or with pros).
- Expected time: 6-10 hours for a basic refresh; 1-2 weekends for a fuller setup; add 1-2 weeks if pros are involved (pergola, gas line, new electric).
- Difficulty: Easy to Moderate.
- Skill level: Beginner-Intermediate DIY.
- You’ll be able to decide: best rug size, furniture spacing, lighting brightness (lumens), shade choice (umbrella vs shade sail vs pergola), and privacy options for your lot or balcony.
- Safety-first: use outdoor-rated, UL-listed fixtures, GFCI protection for plug-in lighting, and keep clearances around heaters/fire features. Check local codes and manufacturer instructions; call a licensed pro for wiring, gas, structural shade, or anchoring to the house.
Quick Overview
A well-planned patio boosts your home’s usable square footage, invites you outside more often, and makes hosting simpler.
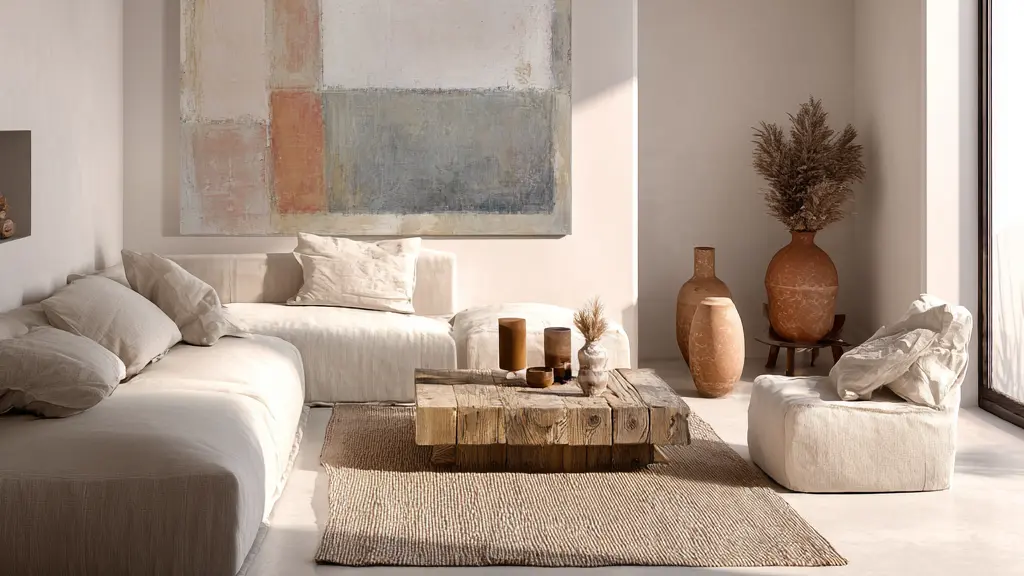
Thoughtful outdoor patio decor – from seating and rugs to lighting, shade, and privacy – turns a slab or balcony into a purposeful place for everyday living.
With clear measurements and a few design rules, you can make smaller spaces feel bigger, protect your investment from weather, and keep everything code-conscious and safe.
Even renters can achieve big impact with reversible, non-destructive upgrades like freestanding screens, planters on wheels, and clamp-on lights.
Materials & Tools
- Measuring and layout
- 25 ft tape measure
- Chalk line or outdoor-safe marking tape
- Carpenter’s level (24 in) and 1/4 in spacer to check slope
- Cleaning/prep
- Outdoor broom, stiff nylon deck brush
- Patio/deck cleaner (per surface), garden hose with nozzle
- Polymeric sand (for pavers, if re-sanding joints)
- Rugs and furniture
- UV-stabilized outdoor rug (5×8 ft for bistro; 8×10 or 9×12 ft for lounge)
- Weather-resistant furniture (powder-coated aluminum, teak, HDPE)
- Waterproof cushions or quick-dry foam inserts
- Shade and privacy
- Umbrella (9-11 ft) with 50-90 lb base; or
- Shade sail kit (rated hardware, 6×6 posts if freestanding); or
- Freestanding or planter-based privacy screens
- Lighting and power
- Outdoor-rated string lights (UL Wet Location), mounting hooks, cable
- Solar path lights (50-100 lm each) or low-voltage kit
- Outdoor smart plug/timer, GFCI-protected receptacle
- Exterior-grade extension cord (12-16 AWG, outdoor-rated)
- Warmth and comfort
- Propane fire bowl (e.g., 40,000 BTU, with cover)
- Portable electric patio heater (tip-over and overheat protection)
- All-weather covers for furniture and heater
- Hardware
- Masonry drill bit (3/8 in) and concrete screws (if mounting to masonry)
- Stainless lag screws and washers (for wood)
- Zip ties or cable clips for cord management
- Plants and containers
- Container garden planters with drainage, wheeled caddies (optional)
- Quality potting mix and slow-release fertilizer
- Hose timer and drip spikes (optional)
Budget alternatives: recycled plastic Adirondack chairs, polypropylene rugs, solar string lights, DIY cedar planter boxes, sand-filled umbrella bases.
Safety note: Use ladders on flat ground with a spotter; plug outdoor lighting into GFCI-protected outlets; keep heaters and fire features at manufacturer-specified clearances; never drape fabric near heat. Call a licensed pro for new outlets/circuits, hardwired fixtures, gas lines, or structural shade/pergola installs. Local codes vary – always verify and follow manufacturer instructions.
Step-by-Step: How to Build Your Backyard Oasis
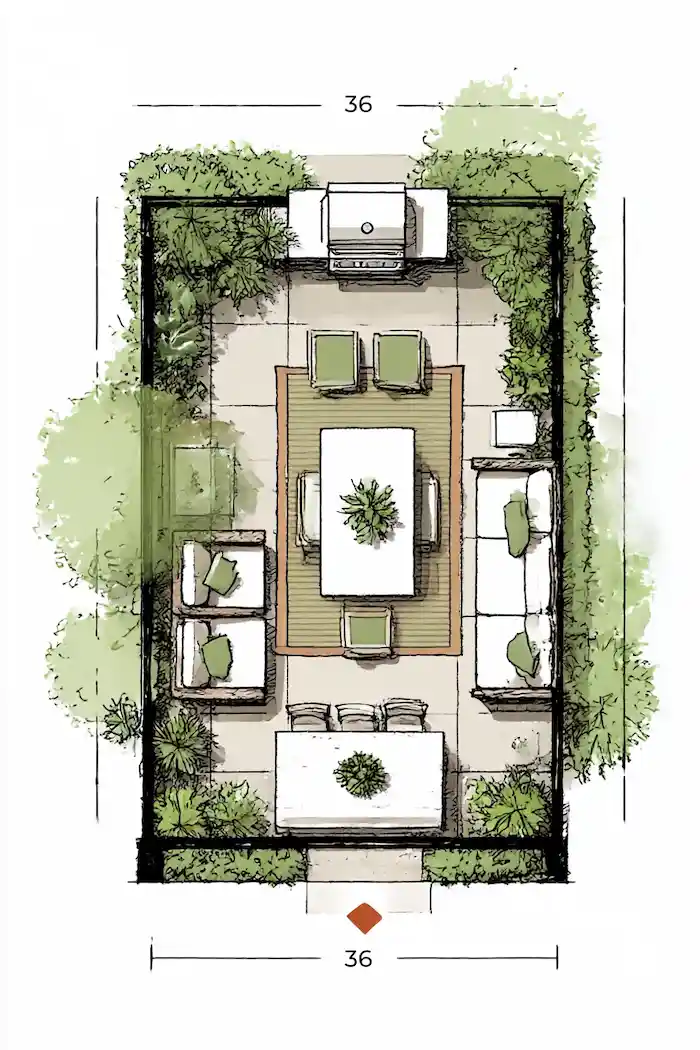
Step 1: Measure and map your zones
Measure the patio (e.g., 10×12 ft) and sketch three zones: lounge, dining, and grill (or bar cart).
Keep 36 in minimum clear walkways. Allow 24 in around chairs so guests can slide back without bumping walls or rails. Plan where cords and hose lines can run safely out of traffic paths.
Pro tip: Use painter’s tape or chalk to outline furniture footprints. This quick mockup reveals tight spots before moving heavy pieces.
Step 2: Prep the surface for safety and comfort
Sweep thoroughly, then wash the surface with an appropriate cleaner (composite, wood, concrete, or stone).
Check drainage – aim for about 1/4 in per foot slope away from the house to help water shed.
For pavers, add polymeric sand to joints and mist to set; for decks, inspect for loose fasteners or splinters and spot-sand if needed.
Verification check: After rinsing, watch water movement. Puddling near doors suggests you need to squeegee water away or raise rugs on breathable pads.
Step 3: Anchor the layout with an outdoor rug
Choose a UV-stabilized outdoor rug sized so the front legs of seating rest on the rug.
Typical picks: 8×10 ft for a loveseat + chairs; 9×12 ft for a sectional. On decks, add a breathable rug pad to promote airflow.
In windy areas, place the coffee table or planters on corners to prevent lift.
Pro-tip: Patterned rugs hide pollen and dust; striped rugs elongate a short patio visually.
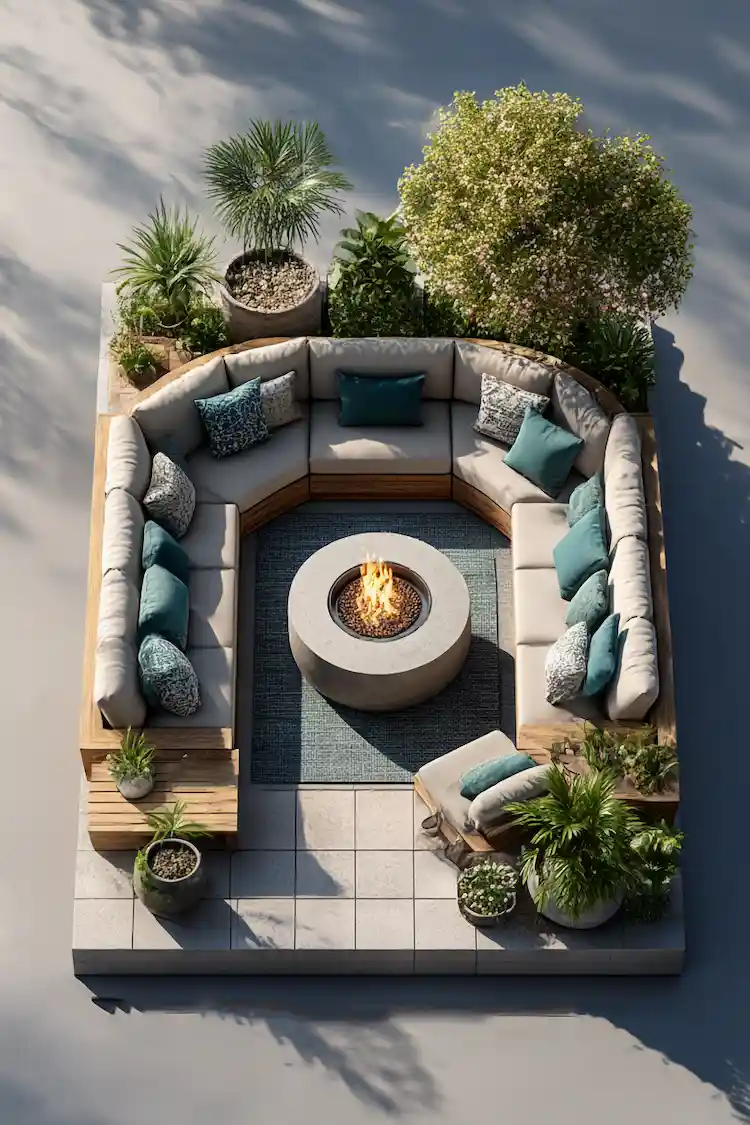
Step 4: Arrange seating for easy conversation
Form a rough U-shape around a coffee table or fire bowl. Keep 16-18 in between seat edge and table for comfortable reach.
Aim for 8-10 ft across the conversation area so voices carry without shouting. Seat height between 17-19 in pairs well with 16-18 in coffee table height.
Step 5: Add shade for midday comfort
For a flexible solution, a 9-11 ft umbrella with a heavy base is quick and renter-friendly.
For larger coverage, a shade sail should be installed with 10-20° slope for runoff, turnbuckles for tension, and 12-18 in setback from anchor points. If you’re considering a pergola, confirm footing requirements and wind loads.
Safety note: Attaching to a house ledger or running new footings is a structural task – hire a licensed contractor and check local permits.
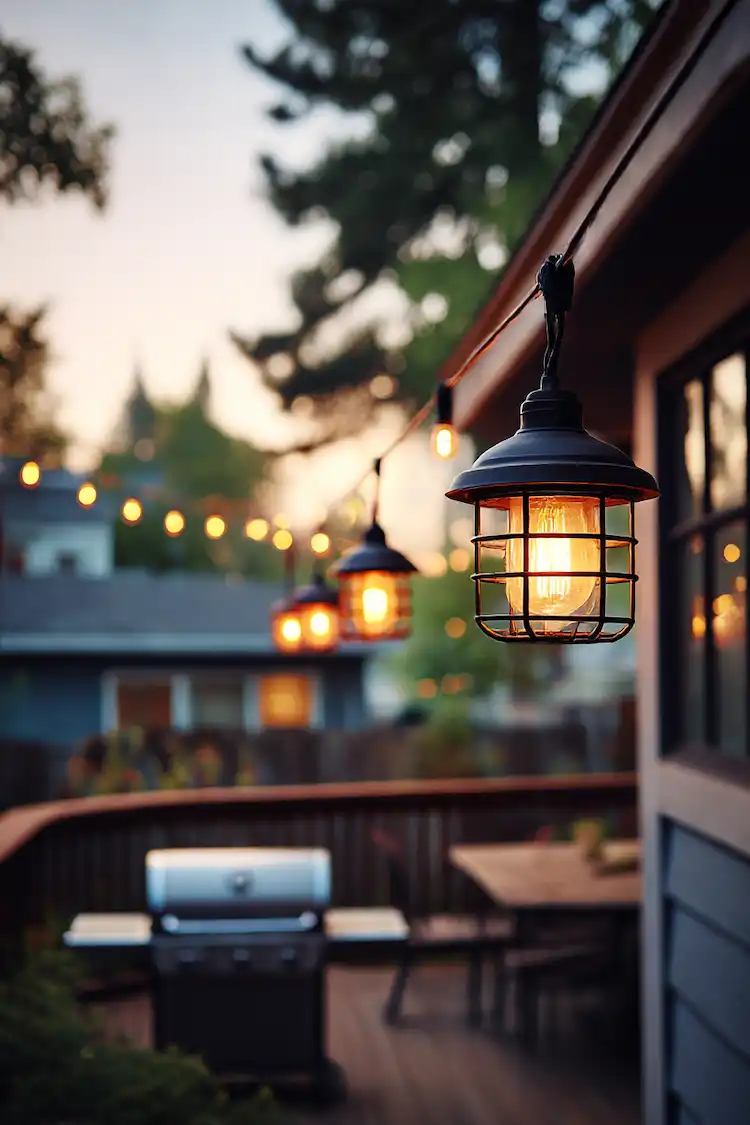
Step 6: Layer lighting for outdoor patio decor
- Ambient: Outdoor-rated string lights (2700-3000K) draped with a gentle 12 in sag; space attachment points 24-36 in apart. Use UL Wet Location products on a GFCI outlet and an outdoor smart plug or timer.
- Task: Clip-on or wall lights near the grill or prep areas. Keep luminaire tops below eye level to reduce glare.
- Accent: Solar path lights (50-100 lumens each) spaced 3-6 ft apart define edges without overlighting.
Verification check: After dark, stand at each entry and look for glare or dark spots. Adjust heights or add a dimmer-capable plug if needed.
Step 7: Add warmth safely
A propane fire bowl (≈40,000 BTU) offers instant ambiance. Place on a non-combustible surface, maintain all clearances per the manufacturer (both vertical and horizontal), and keep a Class B/C extinguisher nearby.
Electric patio heaters should have tip-over and overheat protection and be plugged into GFCI-protected circuits.
Safety note: Never run a gas line or hardwire heaters yourself. Licensed pros only, and always follow local codes and manufacturer instructions.
Step 8: Create privacy and tame wind
Use freestanding DIY privacy screens, tall planters with trellises, or outdoor curtains on a freestanding rod.
Typical privacy height is 5-6 ft; check HOA/municipal limits. For umbrellas, use the manufacturer-recommended base weight and close them when winds exceed the rating.
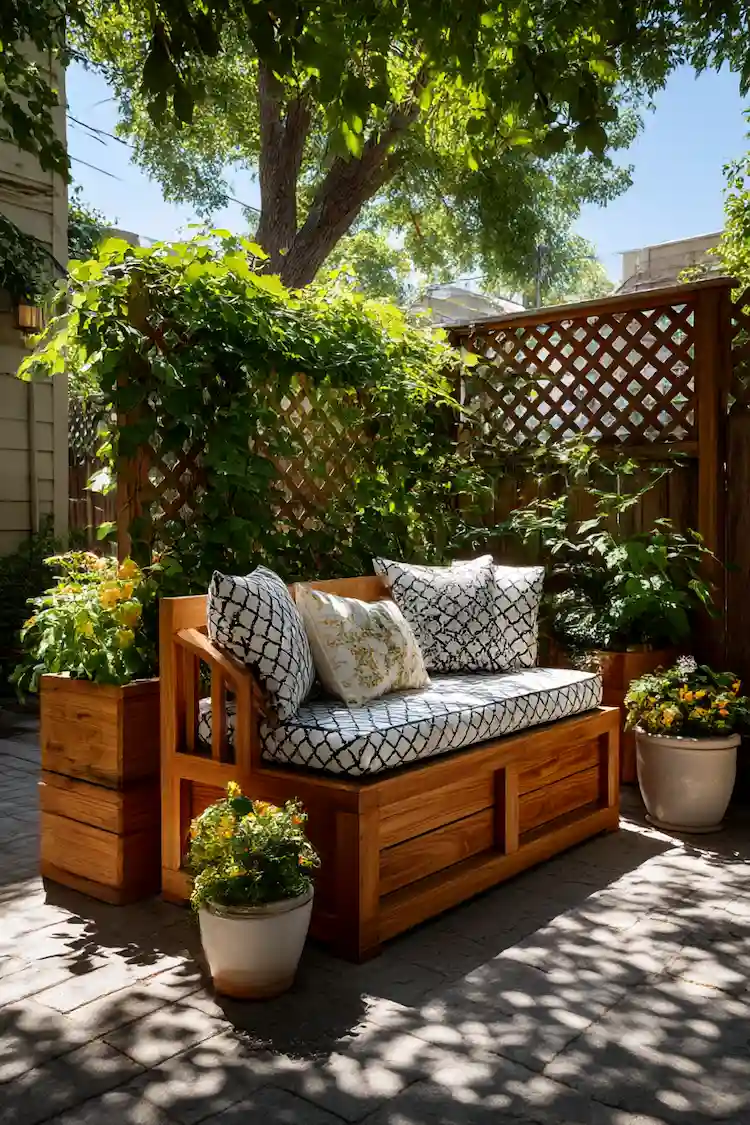
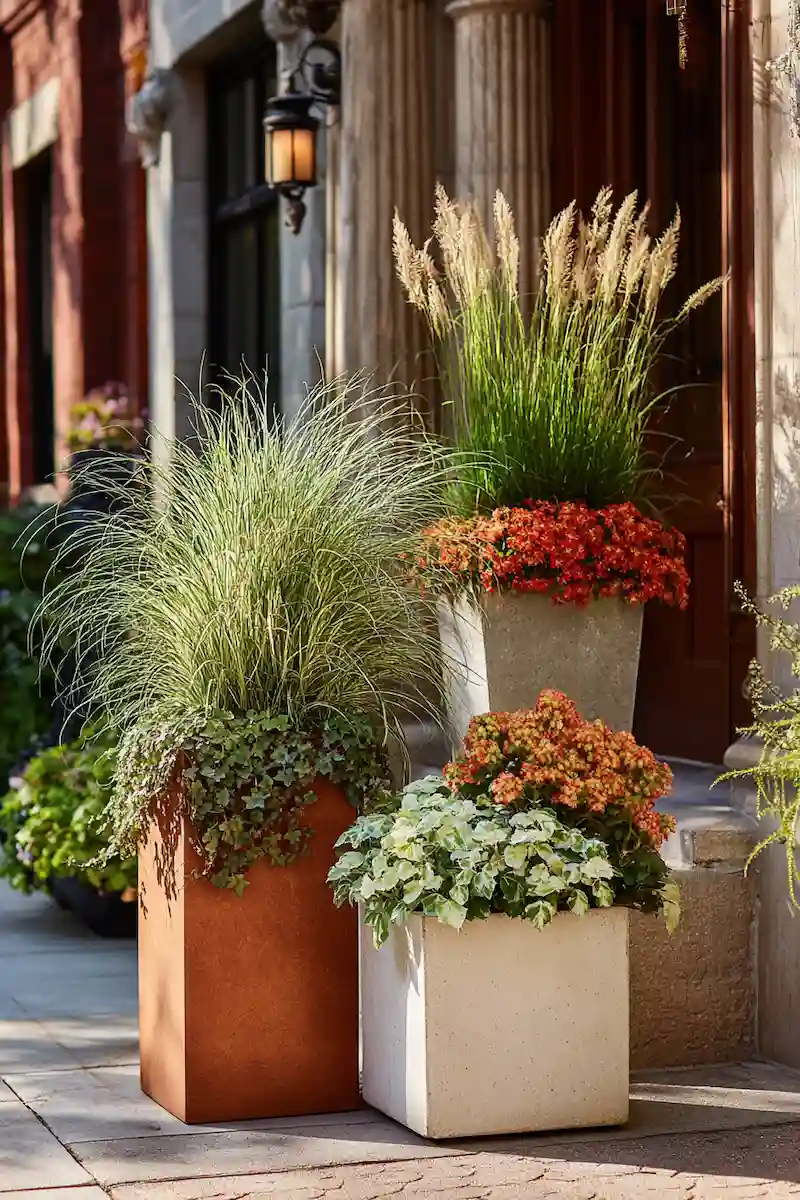
Step 9: Green it up with containers
Choose planters with drainage and group in clusters of 3 for impact. Follow the thriller-filler-spiller formula and match sun/shade needs.
As a rule of thumb, provide 1 gallon of soil per foot of expected plant height. Add slow-release fertilizer and consider a simple drip spike set to a hose timer.
Pro-tip: For mosquito comfort, tuck in citronella, lemongrass, lavender, or catnip around seating (they’re not a shield, but they help).
Step 10: Protect and store
Use furniture covers when not in use and a 120-150 gal outdoor storage bench or deck box for cushions.
Add silica gel packs inside storage to reduce moisture. Label bins by zone (lighting, grilling, gardening) so you can deploy within minutes.
Pro tip: Keep a small “reset kit” (broom, glass cleaner, microfiber towels) in the deck box for quick tidy-ups before guests arrive.
Variations, Ideas, and Style Tips for Outdoor Patio Decor
- Small-Patio Power Moves
- When/why: Balconies and tight townhome slabs.
- Pros: Fast, renter-friendly; folding furniture; small patio ideas shine.
- Cons: Limited seating counts; storage constraints.
- Cost/time: $300-$900, 4-8 hours.
- Modern Minimal
- When/why: Clean lines, low visual clutter.
- Pros: Easier maintenance; timeless palette (charcoal, natural wood).
- Cons: Less cozy without textiles – add texture via outdoor rugs and pillows.
- Cost/time: $900-$2,500, 1 weekend.
- Boho Layers
- When/why: Collected look with mixed patterns and lanterns.
- Pros: High comfort; great for lounging.
- Cons: More textiles to store; keep waterproof cushions.
- Cost/time: $800-$1,800, 1 weekend.
- Coastal Calm
- When/why: Light woods, blues, stripes, rope details.
- Pros: Relaxed vibe; easy to match accessories.
- Cons: Light fabrics show soil faster.
- Cost/time: $1,000-$2,200, 1-2 weekends.
- Rustic Farmhouse
- When/why: Wood textures, galvanized accents, lanterns.
- Pros: Warm and inviting.
- Cons: Real wood needs sealing; consider HDPE lookalikes.
- Cost/time: $1,200-$3,000, 1-2 weekends.
- Entertainer’s Layout
- When/why: Larger groups, bar cart, multi-zone lighting.
- Pros: Flexible seating; patio lighting ideas support gatherings.
- Cons: Higher budget; more setup time.
- Cost/time: $1,800-$4,000+, 2 weekends.
- Shade-First Setup
- When/why: Hot climates, west-facing patios.
- Pros: Shade sails and pergolas extend daytime use.
- Cons: Structural work may need permits/pros.
- Cost/time: $600-$3,500+, 1-2 weekends + pro.
- Low-Maintenance Evergreen
- When/why: Minimal upkeep, drought-tolerant planters, solar lights.
- Pros: Fewer chores; resilient finishes.
- Cons: Less seasonal color.
- Cost/time: $600-$1,400, 1 weekend.
Safety Notes & Common Mistakes
- Do keep all heaters and fire features at manufacturer-specified clearances; place on non-combustible surfaces; supervise at all times.
- Do use outdoor-rated (UL Wet Location) string lights and plug into GFCI-protected outlets with weatherproof in-use covers.
- Don’t run cords across walkways or under rugs; route along edges with clips.
- Don’t attach shade sails to undersized anchors; verify structure and hardware ratings.
- Don’t use indoor rugs or cushions outdoors; they mold and fade quickly.
- Verify drainage; avoid placing rugs where water pools at doors.
- Code/manufacturer reminder: Local codes vary. Always follow manufacturer instructions, and hire licensed pros for electrical, gas, or structural work.
Cost, Time & Difficulty
Assumptions: ~10×12 ft patio, mainstream materials, DIY labor unless noted.
| Scenario | Estimated Cost | Time | Difficulty | Notes |
| Budget DIY refresh | $300-$800 | 6-10 hrs | Easy | Rug, 2-4 chairs, solar lights, planters |
| Mid-range makeover | $900-$2,500 | 1-2 weekends | Easy-Moderate | Sectional or loveseat set, string lights, umbrella |
| Shade-focused | $600-$3,500+ | 1-2 weekends (+pro) | Moderate | Shade sail/pergola may need permits/pro |
| Premium/pro elements | $3,000-$10,000+ | 2-4 weekends (+lead time) | Moderate-Hard | Pergola build, hardwired lighting, gas fire |
Maintenance & Upkeep
- Monthly: Sweep, wipe tables, rinse the rug, check cord clips and light fasteners.
- Seasonal: Deep-clean cushions/covers; reseal wood (per manufacturer); refresh polymeric sand (pavers); prune container plants and replace annuals.
- Before storms: Close umbrellas, cover the fire bowl, stow cushions in an outdoor storage bench.
- Winterizing: Clean and cover furniture; move planters closer to the house; store heaters per manufacturer guidance.
FAQs
How much does it cost to decorate a small patio?
Most small patio ideas can be done for $300-$900 with a rug, two chairs, a small table, solar path lights, and a few planters. Mid-range setups with a loveseat, outdoor rugs, and string lights typically land around $900-$1,800.
How long does a DIY makeover take?
A basic refresh is a single afternoon. A fuller setup with lighting, shade, and planters usually takes 1-2 weekends, not counting any professional work (pergola posts, new outlet).
What outdoor rugs and cushions last the longest?
Look for polypropylene or solution-dyed acrylic rugs and waterproof cushions with quick-dry foam and UV-resistant fabric. Always allow airflow under rugs on decks and store textiles dry.
How can I hang string lights without drilling?
Use freestanding poles in planters, fence clips, or cable clamps on existing structures. Route cords to a GFCI outlet and use UL Wet Location lights on an outdoor smart plug.
Are propane fire pits safe on a wood deck?
Many are safe with a non-combustible base and proper clearances – but always check the manufacturer instructions. Avoid placing under low eaves or fabric. For hard-piped gas lines or electric heaters, hire a licensed pro and check local codes.
What are simple DIY privacy options?
Try DIY privacy screens in planters, freestanding lattice with climbing vines, outdoor curtains on a freestanding rod, or tall container groupings. Confirm height limits with your HOA or municipality.
Conclusion
With a measured layout, weather-smart materials, and layered lighting, outdoor patio decor can transform even a modest slab into a welcoming retreat.
Start with the essentials – rug, seating, light – then add shade, privacy, and greenery for comfort and calm. Keep safety and code compliance at the forefront, and bring in licensed pros for electrical, gas, or structural elements.